Information about integration use cases
The mapviewer can be integrated either by implementing your own mapviewer instance using the provided mapviewer capabilities (in the following reference called div approach) or by using an iframe view (which does not have to be hosted by yourself).
Please note that using an iframe view is usually the easier approach as this normally overcomes CORS related issues. If you would like to use a div integration, you should use a proxy-pattern or ensure that you're running the application in the mapviewer's domain.
Additionally, the div approach, requires an optional parameter handling. Check div-integration and IntegrationAPI Function Calls for more details.
To give an idea of both integration use cases, you can check both implementation under the Tutorials-Tab -> General.
iframe-Integration
An iframe integration is the simplest way of using the mapviewer component. Typically, there is no need for further adjustment and/or specific changes. For the actual usage you only need to refer to a website running the mapviewer application. Referring this website is done by defining the iframe src= attribute.
A working iframe example with additional information can be found here: iframe-integration
div-Integration
An div integration is a more advanced possibility of running your own mapviewer instance. You can modify the actual start-up behaviour, overwriting css style definitions or implementing custom-event handling and emitting. Please note: Usually this requires that the mapviewer application itself and your embedding application needs to run on the same domain. Otherwise, CORS related issues might occur and/or the application is not fully functional.
A working div example with additional information can be found here:
div-integration
IntegrationAPI Core Concepts
To simplify the integration API usage, the mapviewer does not differ between the above-mentioned integration approaches. Regardless of whether iframe-integration or the div-integration is used, the same interface can be called. Internally the postMessage/addEventListener mechanism ensures that called functions are passed to the mapviewer framework, where the actual functions are called.
To conclude, two mechanism are used
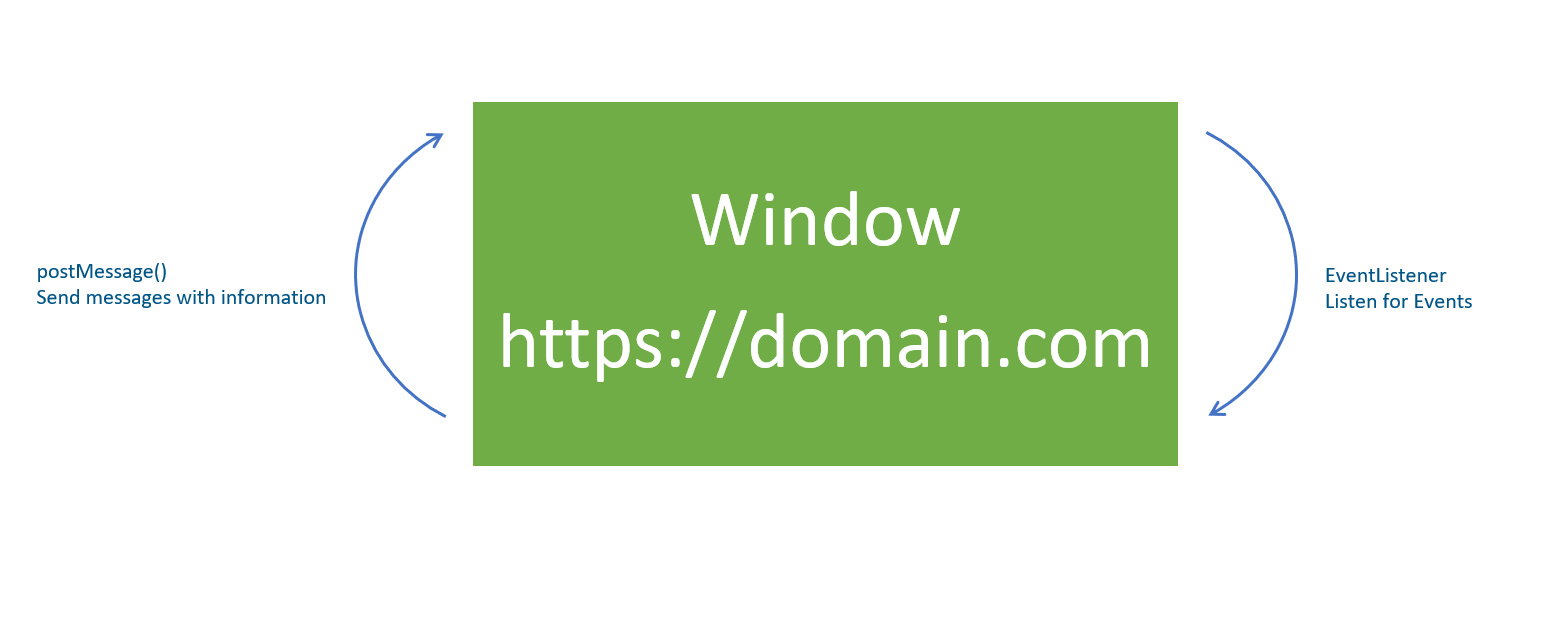
window.postMessage()- This is used to call the actualintegrationAPIfunctions.window.addEventListener()- This is used to receive information from the integrationAPI functionCall and to get information about mapviewer events and data in a passive manner.
To give you a short introduction about these concepts: the postMessage/addEventListener approach safely enables communication within and between window object(s).
- In this context within means, that messages can be sent through the overall window eventBus where the application itself sends and receive those messages using the window eventSystem.
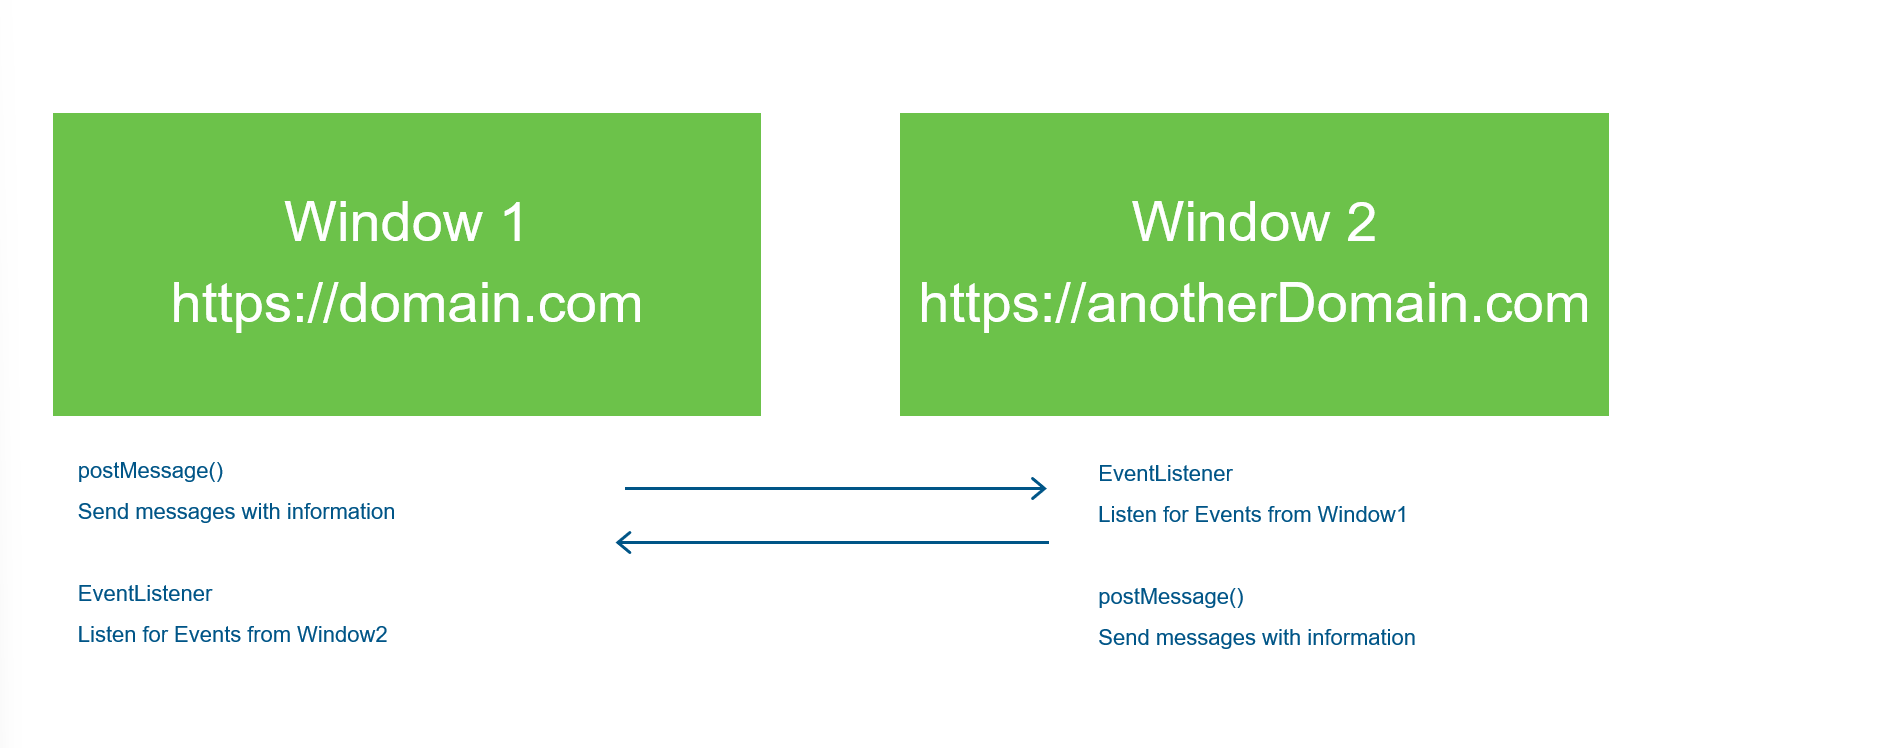
- In this context between means, that messages can be sent from one
window(or popup) to anotherwindow. This is definitely needed and the key concept if the mapviewer is integrated as aniframe.
In order to have a better understanding of the general functionality in respect to the postMessage/addEventListener approach, we recommend to have a look at the following documentation: MDN Documentation
IntegrationAPI Function Calls - postMessage
As outlined in the previous section, calling an integrationAPI function, only requires an event via postMessage. This is the part to trigger/call functions, which are offered by the integrationAPI.
For our mechanism we use two postMessage() arguments.
eventdata, which should be sent. Themessageneeds to be defined as an object withfunctionName(mandatory),detail(mandatory),eventName(mandatory fordiv, optional foriframe) andtarget(optional) as properties.functionName: Defines the actual function which should be called.detail: Defines the actual function params which should be passed.eventName: Defines the actualevent-type.- Default value is
message. If you need to customize the value for adivintegration, assure to change your client implementation (window.addEventListener("custom_name", ...)divintegration: Needs to be changed to anything else thanmessage.iframeintegration: Can be used to implement a custom event-listener mechanism. There is no need to do so in theiframeintegration as themessagetype is fine here.
- Default value is
target: Can be set to allow the communication to multiple map instances on a single page in an iframe integration. Everytime an integrationAPI call is fired with a definedtargetthereponse-eventincludes the correspondingtarget-property from where the call was triggered.- default value is
undefined. If you customize the value, use theidvalue of your content window.
- default value is
identifier: Defines an optional identifier for a single message. This is useful to assure that a specific request has been completed. The integration API works asynchron (see IntegrationAPI synchron), therefore it is not guaranteed that your requests will be completed in the same order. Theidentifierwill be returned with the integration API response and can be used to check which specific request is completed.
  {
      functionName: functionName,
      detail: detail,
      eventName: eventName,
      target: target,
      identifier: identifier
  }
targetWindowfor the event to be dispatched. TheintegrationAPIreceives all events from any source, so you always need to set this property to*.
In our tutorials we are using a wrapper function, which can be defined like the following. This example would work for iframe integrations as we are accessing the iframe's contentWindow property. For div integration check the next example, where no wrapper function is used.
  /**
  * @description Wrapper function to call <windowElement>.postMessage
  * @param {string} functionName -- function to call
  * @param {functionParam} detail -- params to pass to the function
  */
  function postEvent(functionName, detail, eventName, target, identifier) {
      //For iframe integration: Use contentWindow property to get the iframe window instance.
      //For div integration: Do not use the contentWindow property
      //Get iframe html element where mapviewer is placed
      const integrationElement = document.getElementById('mapIntegrationElement').contentWindow;
      if (integrationElement){
          //post the actual message
          integrationElement.postMessage({functionName: functionName, detail: detail, eventName: eventName, target: target, identifier: identifier}, "*")
      }
  }
Of course, you do not need to use a wrapper function. To give an example of posting a message to the mapviewer application embedded by a div integration to zoom to a specific point with a specific scale (here 1:5000), check the following:
  //Get html element where mapviewer is placed
  //DO NOT USE .contentWindow as this is only valid for the iframe itegraion
  const integrationElement = document.getElementById('mapIntegrationElement');
  const functionParams = {
          geometry: {
              type: "point",
              x: 405647,
              y: 5662584,
              spatialReference: {
                  wkid: 25833
              }
          },
          scale: 50000
      }
  //post the actual message
  integrationElement.postMessage({functionName: "zoomTo", detail: functionParams}, "*")
The mapviewer component will receive this message (defining the function to be called as well as the function parameter) and handle/execute it internally. After the function call is processed, each function will always return at least its functionName and a minimal response defining additional information within the detail-property.
In case of a success, so the functionCall was executed correctly, the following message is sent back:
  {
      //returns the functionName, which was called via postMessage()
      "functionName": "zoomTo",
      "reason": "zoomTo",
      "detail": {
          "message": "successfull zoom"
      },
      "success": true,
      "identifier": "my optional identifier"
  }
In case of an error, so the functionCall was not correctly or caused an error, a corresponding the following message is sent back:
  {
      //returns the functionName, which was called via postMessage()
      "functionName": "zoomTo",
      "reason": "zoomTo",
      "error": "<someDetailsAboutTheError>"
      "success": false,
      "identifier": "my optional identifier"

  }
IntegrationAPI Function Calls - addEventListener
In combination with the postMessage approach, the addEventListener mechanism is used to receive results from the mapviewer's integrationAPI. Using this mechanism, the embedding application can handle results/events posted by the integrationAPI. It does not matter whether the results are based on an actual functionCall via postMessage or whether the application subscribes to a specific event. All events are actively sent from the mapviewer to the application without the need of waiting for asynchronous, potential blocking functions. The only need is to implement the needed eventListener.
To clearly decide which events originate from the mapviewer, the following addEventListener implementation could be used.
One thing must be noted: Defining the eventListener differs between the iframe and div approach. While you can use the typical eventLister for the mesage eventType, you need to define an separate eventListener for your posted event (cf. event definition and div integration example).
As described in the previous section, every message/event (which is documented here) contains the evt.data.functionName. For this reason, it is possible to filter the messages based on the functionName property.
  window.addEventListener(
      "message", //needs to be set to your posted "eventName" if you are using a div integration
      (evt) => {
          //Check whether functionName is
          const functionName = evt?.data?.functionName
          const sucess = evt?.data?.sucess
          const resultData = evt?.data?.detail?.data
          if (functionName === "zoomTo" && sucess) {
              console.log("Zoom was performed")
          } else if (functionName === "addGraphics" && sucess && resultData) {
              console.log("AddGraphics was called")
              console.log("The following graphics were added: " + JSON.stringify(resultData))
          }
          //Handle all other functions
          //Check documentation for all available functioNames
          [...]
      },
      false
  );
IntegrationAPI synchron Calls
The integration API in the standard configuration works asynchron. Therefore, requests can be completed in a different sequence, in compare to the sending order.
For example: A big polygon construction needs more time to be added to the view than a single point.
If your application needs a guaranteed order, you can set the integration API to a synchron mode. Ask your app administrator to change your app.
In this mode, multiple requests will be stacked and completed in the incoming order.
If s single request is independent, and you are on synchron mode, you can add ignoreSynchron to your request to use the request asynchron.
For example:
{
functionName: zoomTo,
detail: {...},
ignoreSynchron: true
}